
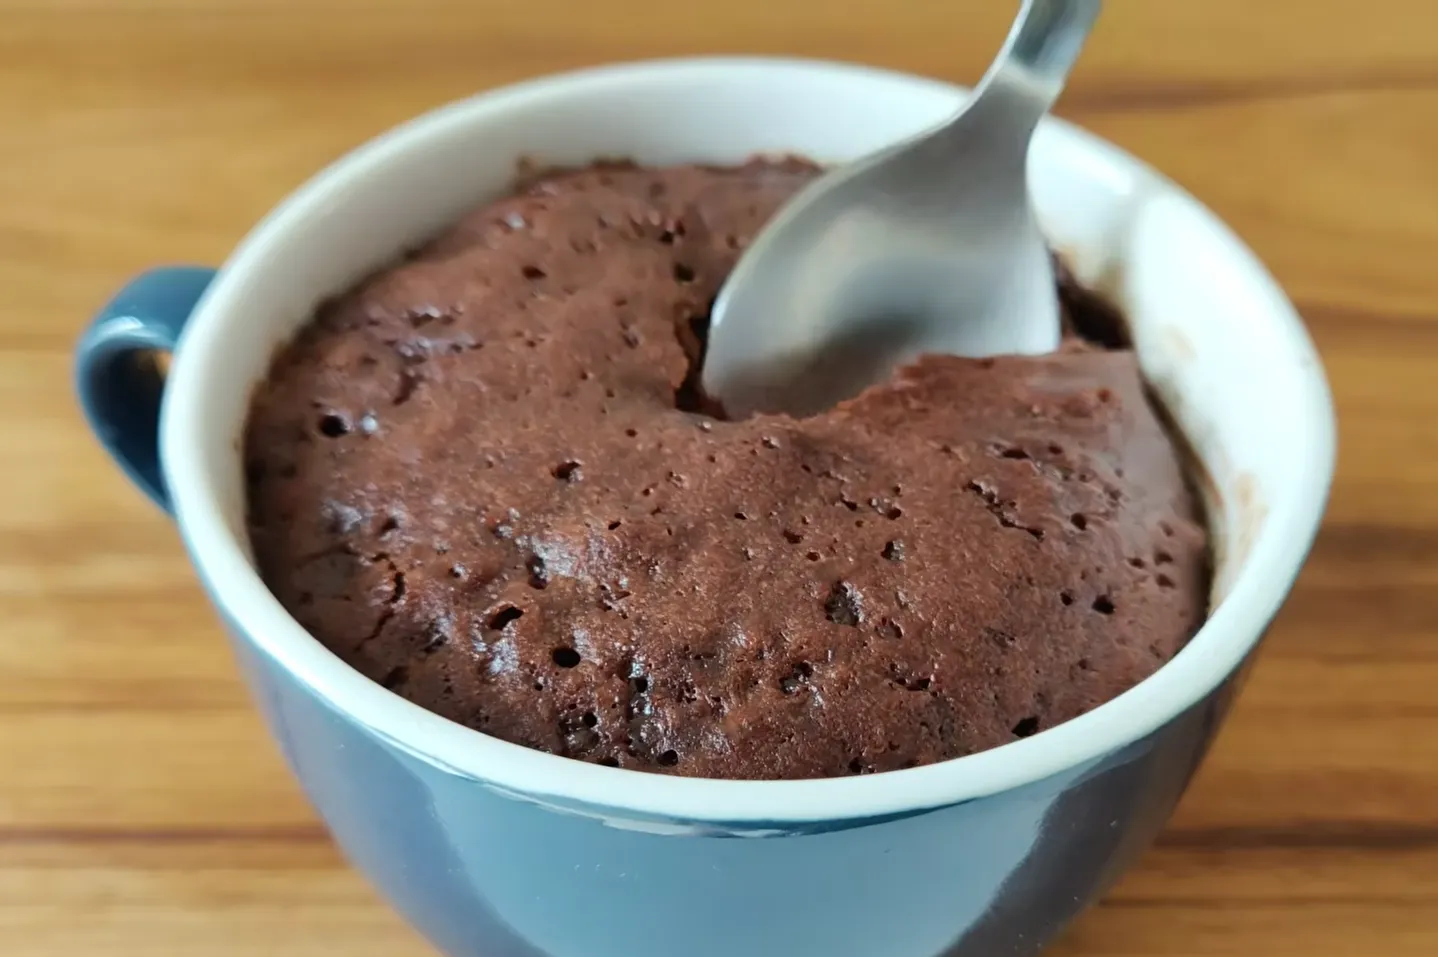
There is something magical about craving chocolate cake at eleven at night and knowing you don’t have to preheat an oven, wash a dozen bowls or wait forty five minutes to get a taste of something warm and fudgy. That is exactly the problem this 3 Ingredient Chocolate Mug Cake solves. It is the kind of recipe that turns a random Tuesday night sugar craving into a two minute victory using nothing more than a mug a fork and a microwave.
If you have ever searched for a dessert that takes less time to make than it takes to scroll through a food delivery app this is it. This mug cake is rich moist deeply chocolatey and finished with a molten piece of chocolate sitting right in the center that melts into a warm gooey pocket the moment you dig your spoon in. No cracked eggs no stand mixer no forty minute bake time and best of all no giant cake sitting in your fridge tempting you for a week.
The beauty of a single serving mug cake lies in its simplicity but simplicity only works if the ratios are right. Too much liquid and you get a chocolate soup. Too much flour and you get a dense rubbery brick that tastes more like a science experiment than dessert. This recipe strikes the right balance between oil cocoa sugar milk and flour so that the final texture comes out soft spongy and slightly fudgy in the center almost like a warm lava cake but without any fuss.
Another reason this recipe stands out is the layering technique. Instead of dumping everything into the mug at once and stirring blindly each ingredient is added in a specific order and partially mixed before the next one goes in. This might sound like an extra step but it actually helps the cocoa powder dissolve properly instead of clumping at the bottom and it keeps the batter smooth instead of streaky. The result is a mug cake that looks and tastes like it came from a proper kitchen not a rushed midnight experiment.
Before jumping into the method let’s talk about what actually goes into this mug cake. You will need a sturdy mug ideally a wide one rather than a tall narrow one since a wider mug allows the cake to cook more evenly in the microwave. A wide mouthed ceramic mug similar to a small cappuccino cup works beautifully because it gives the batter enough surface area to cook through without leaving a raw gooey center everywhere except the middle piece of chocolate you want gooey.
The core ingredients here are oil cocoa powder sugar milk and flour plus a small piece of chocolate for that molten center. While the recipe is famous for being a 3 ingredient mug cake at its heart cocoa powder flour and milk form the essential trio oil helps bind everything into a smooth batter sugar sweetens it and the chocolate chunk on top is what turns a good mug cake into an unforgettable one. Every one of these ingredients is something you almost certainly already have sitting in your kitchen right now which is exactly why this recipe has become such a go to for late night cravings.
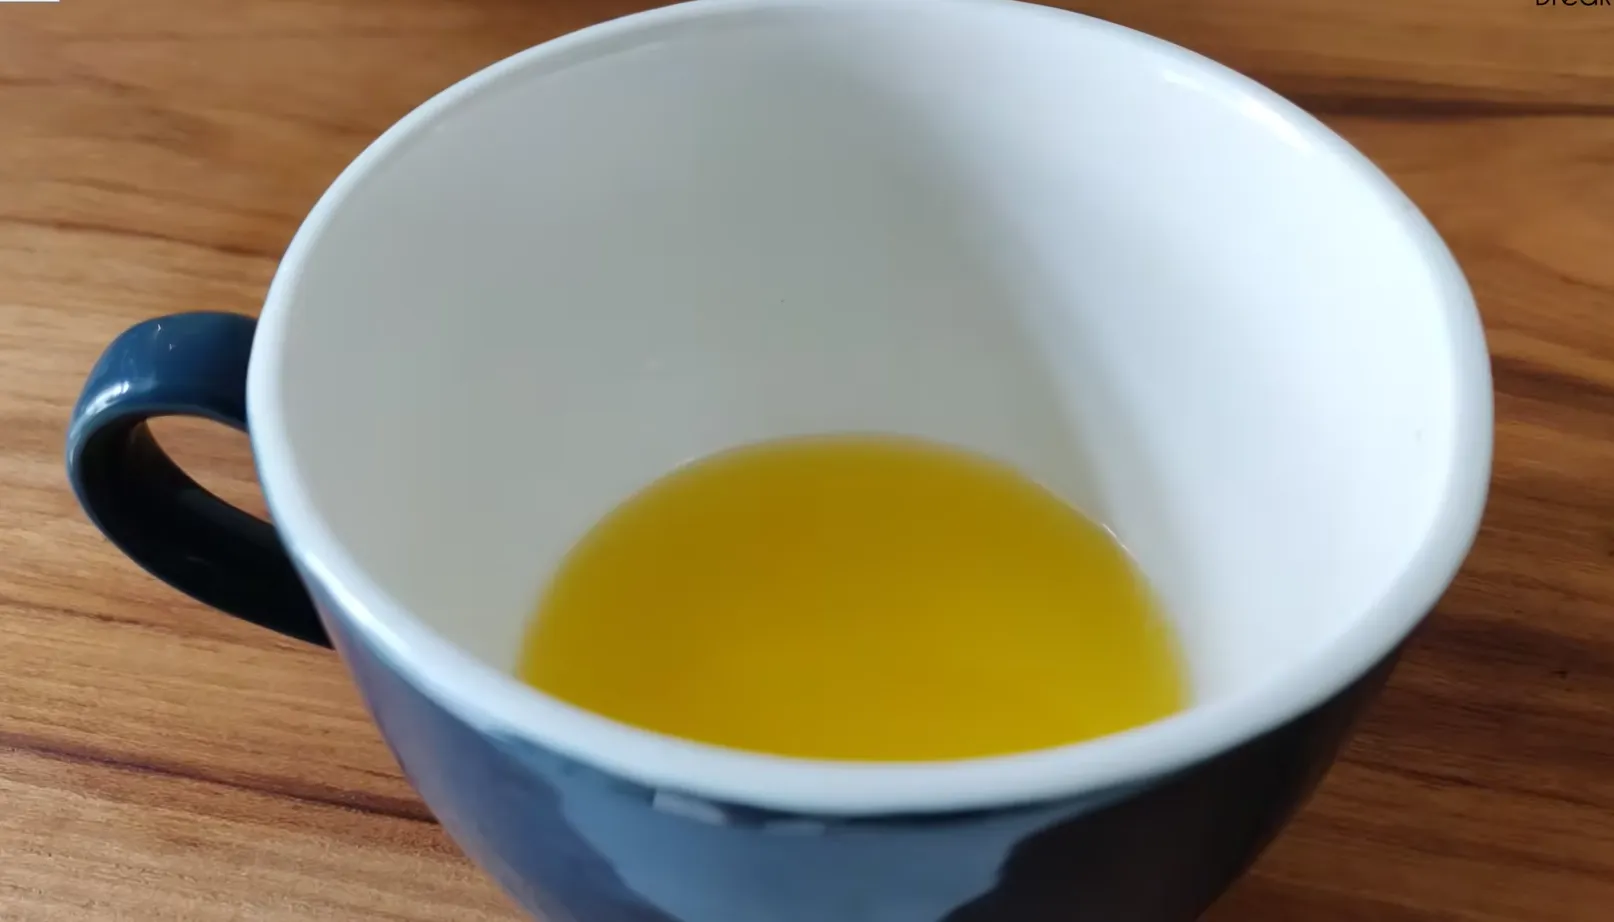
Pour a small amount of neutral cooking oil directly into your mug. You want just enough to coat the bottom in a thin golden layer not a puddle. This oil is going to be the base that helps the cocoa powder bloom and blend smoothly instead of turning into dry bitter clumps. Using oil instead of butter here is intentional. Butter needs to be melted separately which adds an extra step and an extra dish to clean while oil goes in straight from the bottle and mixes instantly at room temperature.
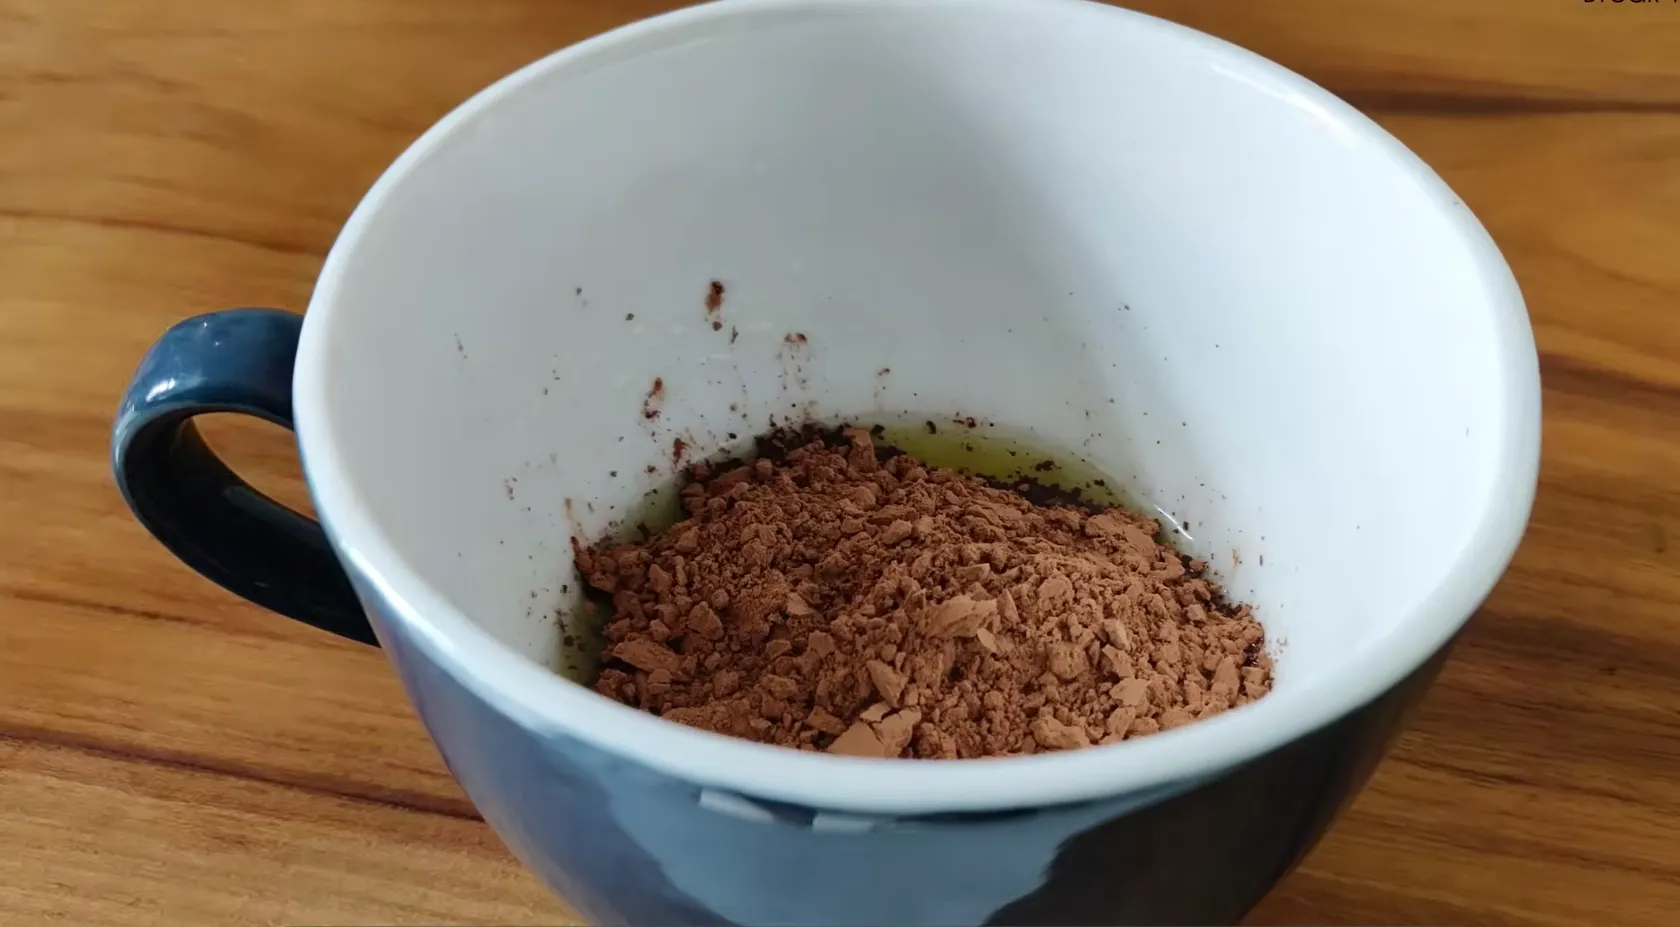
Spoon in your unsweetened cocoa powder directly on top of the oil. At this stage do not stir vigorously. Instead let the cocoa powder sit for a second on top of the oil then gently fold it in. You will notice the cocoa powder starts to soak up the oil around the edges first turning a deep glossy brown while the center remains dry and powdery. This is completely normal. The goal here is not a perfectly smooth cocoa paste yet it is simply about pre hydrating the cocoa so it does not clump later when the wet ingredients are added.
Once the cocoa and oil have combined into a thick dark paste add your sugar. A coarser sugar works particularly well here because it dissolves slowly giving the batter a chance to develop a slightly caramelized deep sweetness rather than an overly sharp sugary taste. At this point the mixture in the mug will look like a dense chocolate fudge sauce sitting at the bottom with sugar crystals piled on top waiting to be folded in. Stir this together until the sugar starts to dissolve into the cocoa oil paste forming a thick almost brownie batter like consistency.
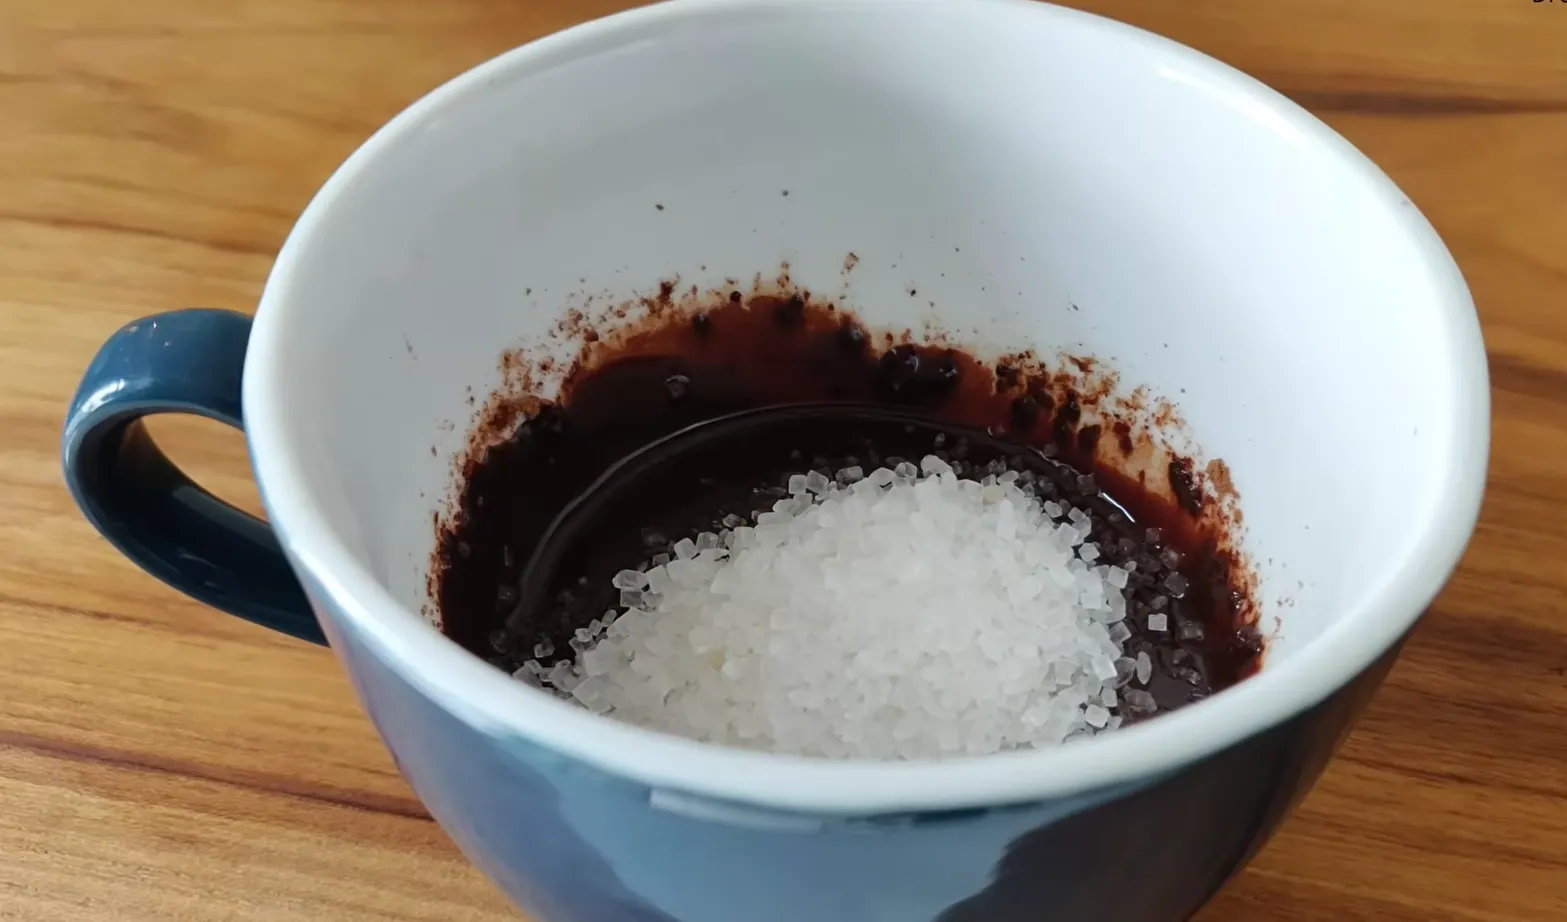
This is the step where the mixture really starts transforming. Slowly pour milk into the mug right into the center of that thick chocolate paste. As the milk hits the paste you will see the batter loosen and lighten turning from a near black fudge texture into a lighter pourable chocolate mixture. Take your time whisking this together with a fork scraping around the edges and the bottom of the mug where the cocoa tends to stick. You are looking for a smooth creamy chocolate milk like consistency with no lumps of cocoa or sugar remaining. This step is crucial because any undissolved sugar or cocoa clumps at this stage will show up as gritty or bitter spots in the finished cake.
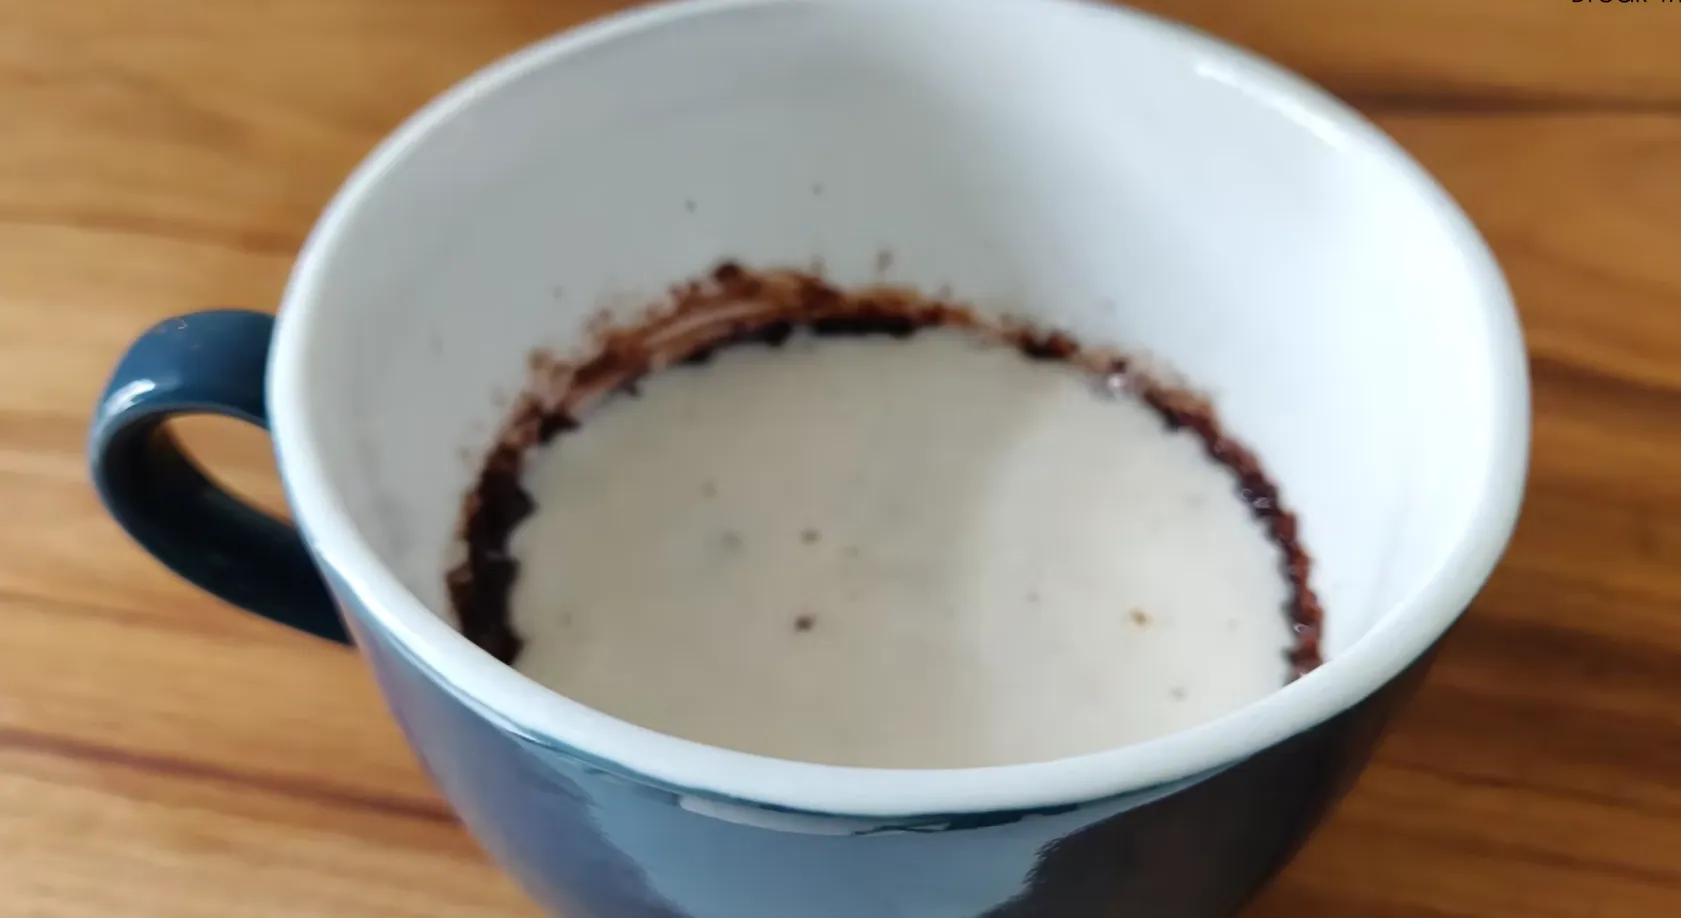
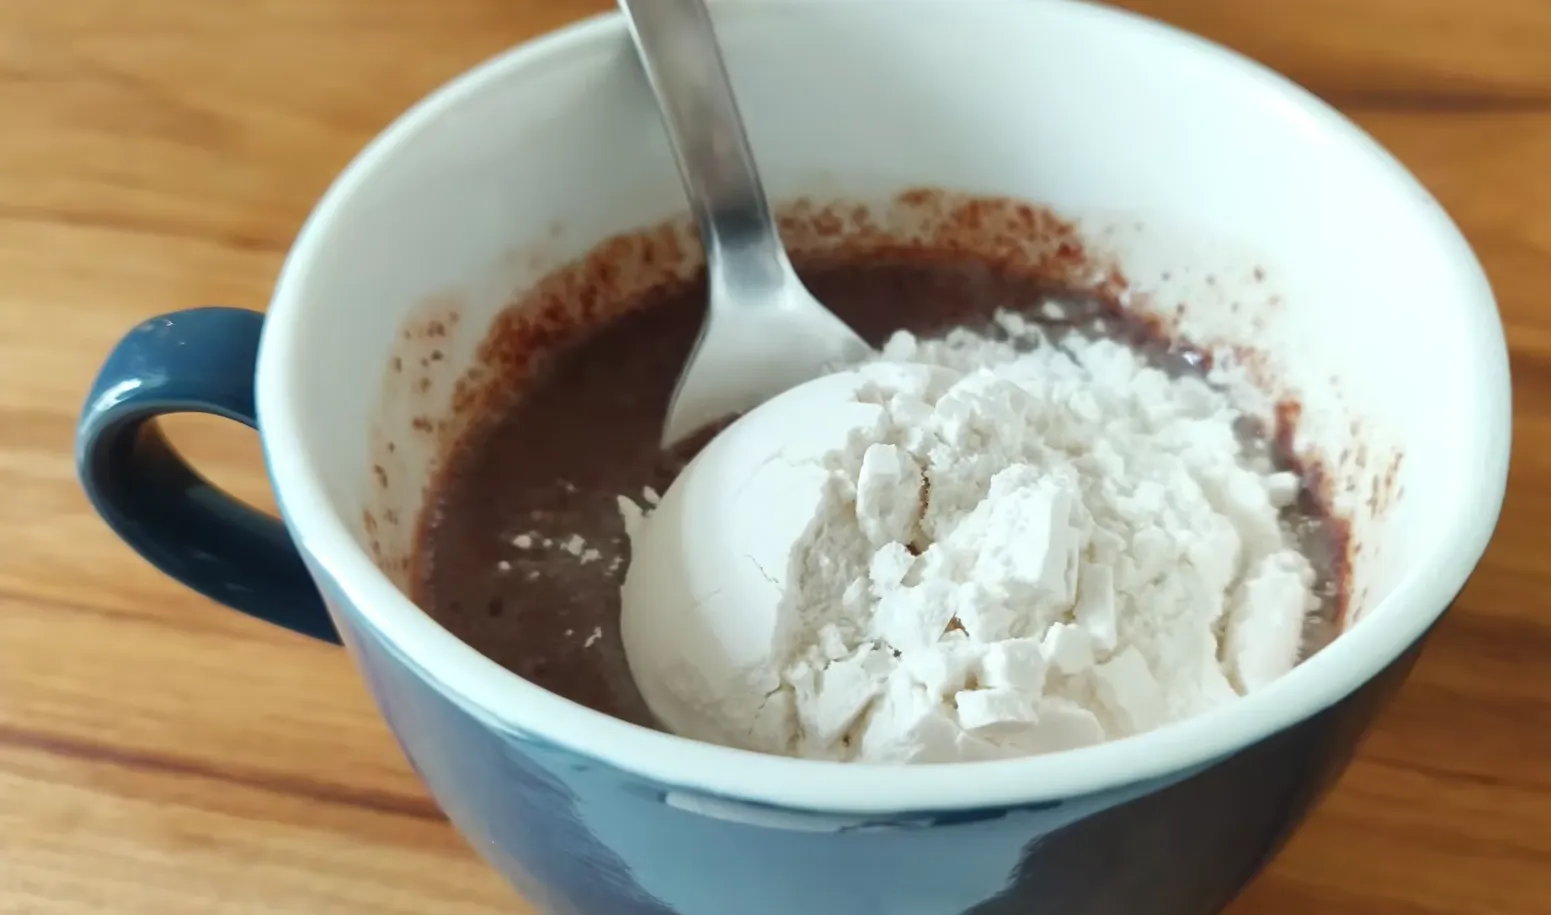
Once your chocolate milk mixture is smooth add the flour. Spoon it in gently rather than dumping it all at once and fold it into the batter using a gentle stirring motion rather than aggressive whisking. Overmixing flour even in something as small as a mug cake can develop the gluten too much and leave you with a tough chewy texture instead of a soft tender crumb. Stir just until you no longer see any dry streaks of flour and the batter turns into a thick glossy pourable chocolate cake batter similar in consistency to a thick pancake batter.
This is the step that takes this mug cake from good to genuinely impressive. Take a small chunk of chocolate a piece broken off from a chocolate bar works best and press it gently into the center of the batter letting it sink about halfway down. As the mug cake cooks this piece of chocolate will melt into a warm gooey pocket right in the middle so that when you break into the cake with your spoon you get that satisfying molten chocolate flow spilling out. This one small addition is what makes the difference between a simple mug cake and one that actually feels indulgent and bakery worthy.
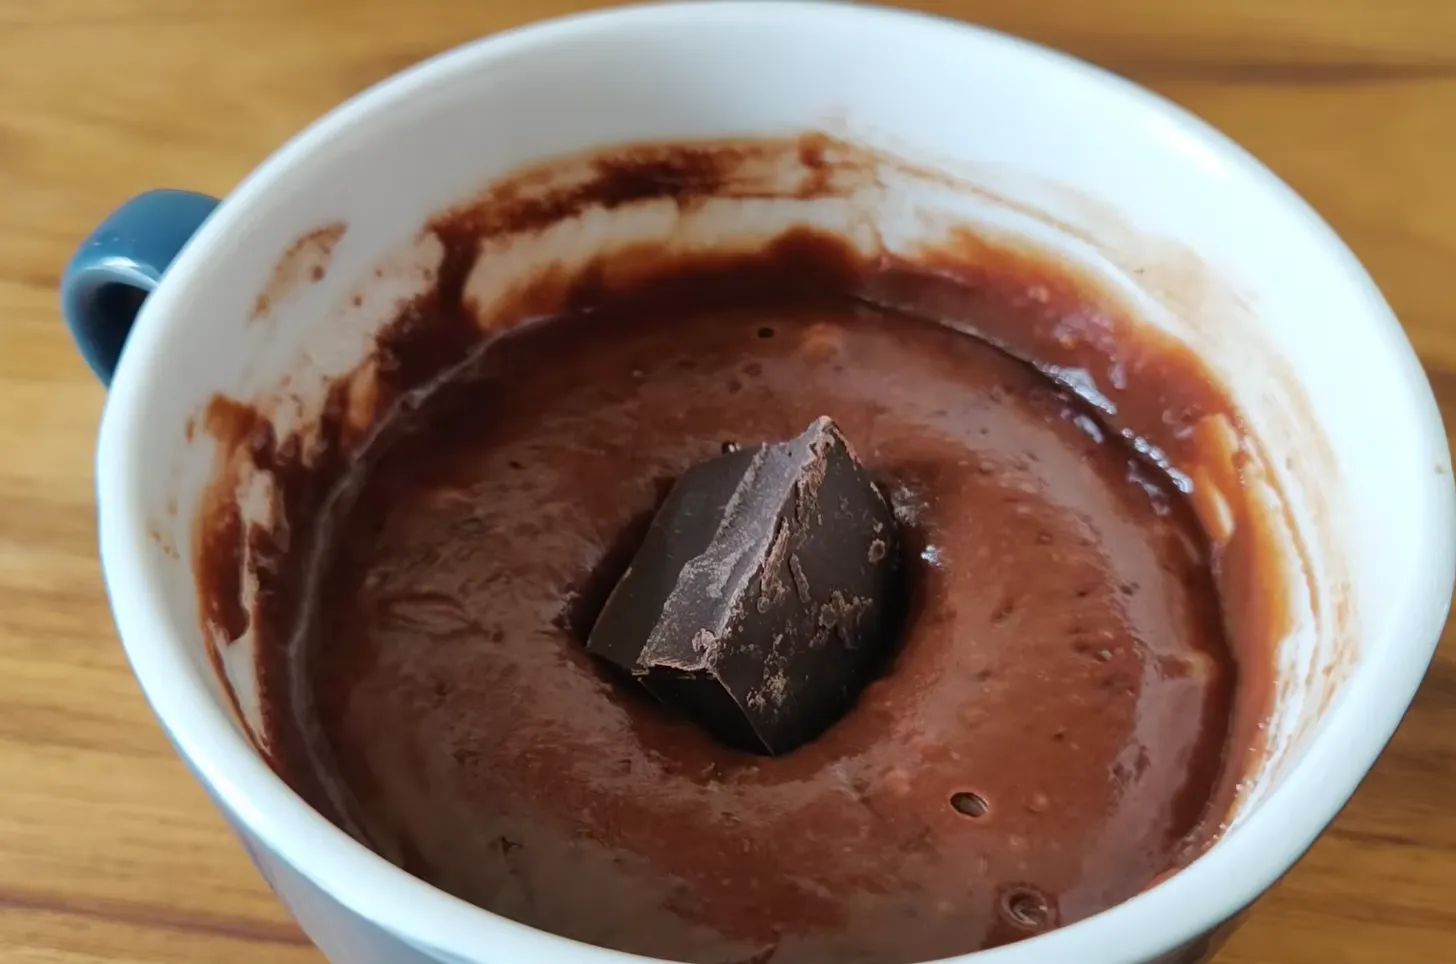
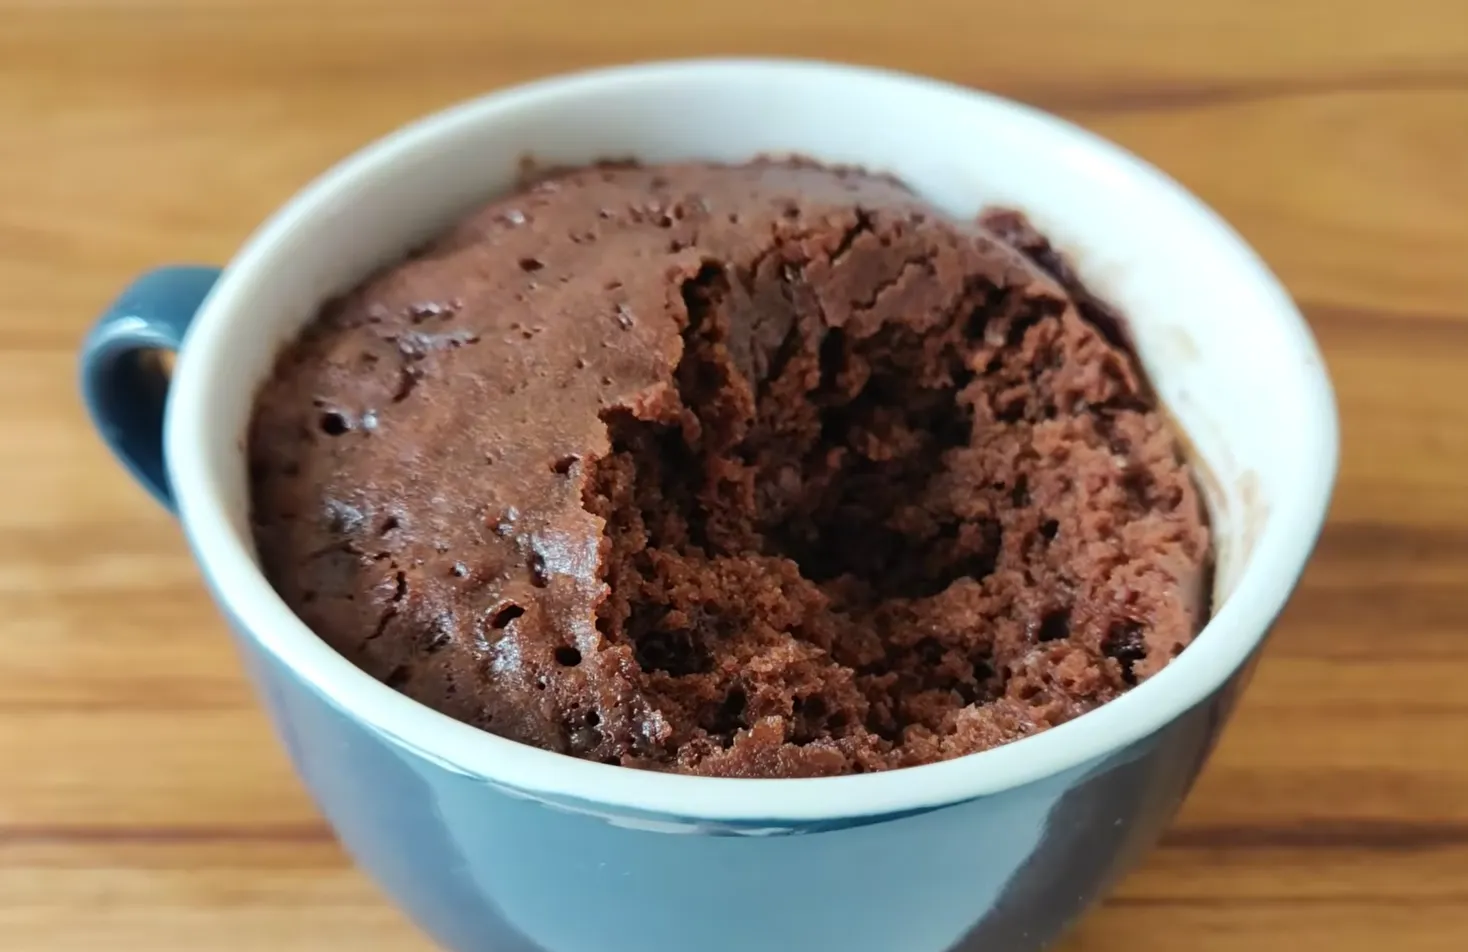
Place the mug in the microwave and cook on high power. The exact time will depend on your microwave’s wattage and the size of your mug but you are looking for the cake to rise up develop small air pockets on the surface and set around the edges while still looking slightly underdone in the very center. This slightly underdone center is exactly what you want since carryover heat will continue to cook the cake for a few seconds after you take it out and the residual gooeyness in the middle blends beautifully with the melted chocolate chunk you added earlier. Keep a close eye during the last few seconds of cooking. Mug cakes can go from perfectly fudgy to overcooked and rubbery very quickly in the microwave so it is always better to check a touch early than to let it run too long.
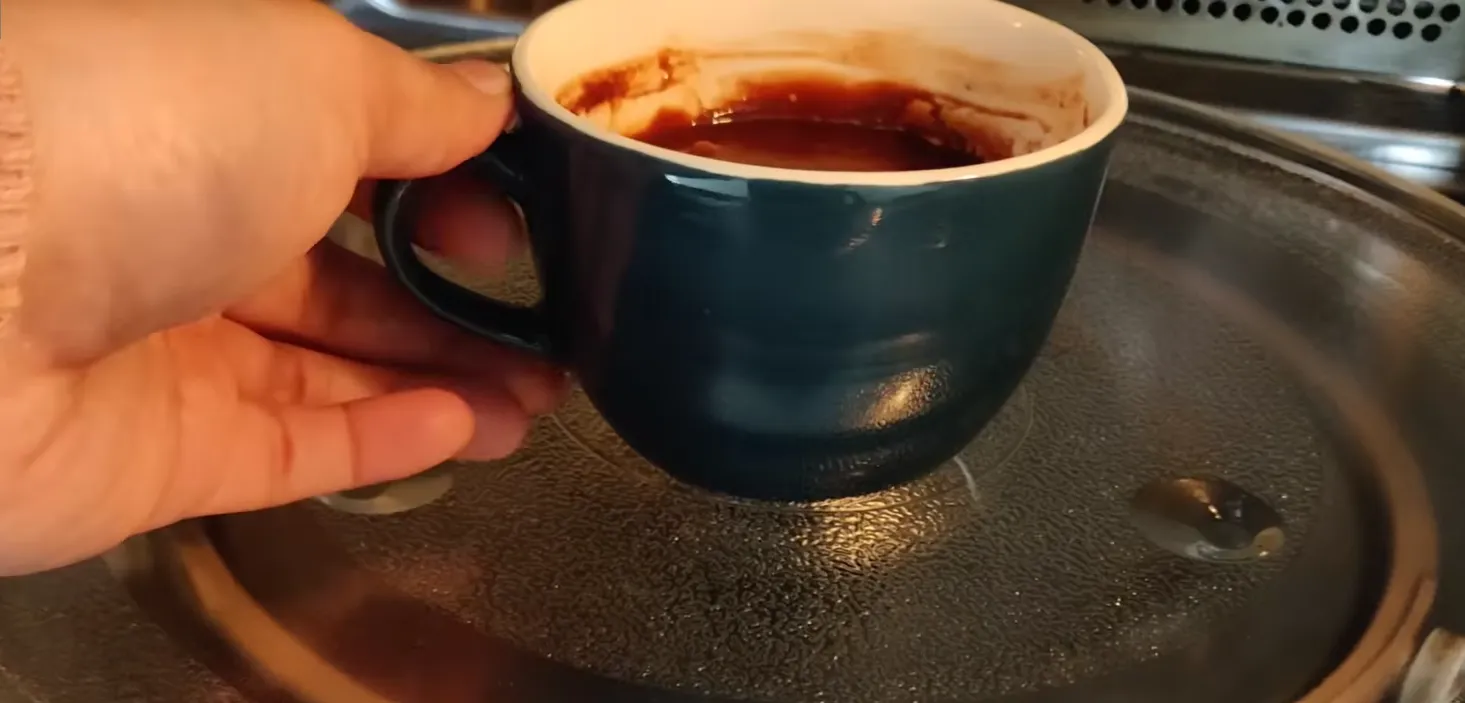
Once you pull the mug out of the microwave resist the urge to attack it immediately. Let it sit for about a minute. This short resting period allows the structure to firm up slightly while keeping that molten center intact and it also means you will not burn your tongue on molten chocolate straight out of the microwave. When you finally break into it with a spoon you should see a soft spongy cake with visible air pockets throughout a slightly cracked glossy top and a warm melted chocolate center oozing out with every bite.
Getting a mug cake right consistently comes down to a handful of small details that make a big difference. First always add your ingredients in the order described rather than dumping everything in together. Building the batter in layers oil first then cocoa then sugar then milk then flour ensures each ingredient has a chance to properly combine with what came before it which prevents lumps and uneven mixing.
Second pay attention to your mug shape. A wide shallow mug cooks far more evenly in the microwave than a tall narrow one. In a narrow mug, the edges tend to overcook while the center remains raw since microwaves cook from the outside in and a taller batter column takes longer for that heat to reach the middle. A wider mug spreads the batter into a shallower layer so it cooks through more evenly and finishes faster.
Third, do not skip the folding technique when adding flour. Stirring too hard at this stage activates the gluten in the flour, which can turn your soft, tender mug cake into something dense and chewy. A gentle folding motion, just enough to eliminate dry streaks, keeps the final texture light and cake-like rather than heavy.
Fourth, keep a very close watch during the final moments in the microwave. Every microwave heats slightly differently, so the exact timing that works for one kitchen might slightly overcook or undercook in another. The visual cue to look for is a top that has risen and set with small cracks and air pockets while the very center still looks a touch glossy and soft. That glossy center is not a mistake it is exactly what gives you that fudgy brownie like bite in the middle once the chocolate chunk you added melts into it.
Finally always use good quality chocolate for that center piece. Since it is the star of the show once you break into the cake using a chocolate you actually enjoy eating on its own will make a noticeable difference in the final result. A darker chocolate here also balances out the sweetness of the cake itself creating a nice contrast between the sweeter cake and the slightly more intense melted chocolate center.
While the base recipe is designed to work with pantry staples there is plenty of room to adjust it based on what you have on hand or what flavor you are in the mood for. If you do not have regular milk available plant based milk such as oat milk or almond milk works just as well and will not change the texture in any noticeable way. The fat content in the milk does play a small role in how creamy the batter turns out so a slightly richer milk will give you a marginally softer crumb while a lighter milk keeps things a touch more airy.
The type of sugar you use also shapes the final flavor more than people expect. A coarser less refined sugar brings a subtle caramel note and a slightly deeper color to the finished cake while regular fine sugar keeps things simple and straightforwardly sweet. If you want to experiment a spoonful of brown sugar in place of half the regular sugar adds a warm molasses like undertone that pairs beautifully with the cocoa.
For the oil any neutral flavored oil works well since its main job is texture rather than taste. Avoid strongly flavored oils as they can clash with the chocolate rather than complement it. If you want a slightly richer more dessert like flavor a small amount of melted butter can replace the oil though keep in mind this adds an extra step of melting before you start layering your ingredients.
When it comes to the flour all purpose flour is the standard choice and gives the most reliable tested results in terms of rise and texture. If you are working with a different type of flour keep in mind that the absorbency can vary so you may need to adjust the amount of milk slightly to keep the batter at that same thick pourable pancake like consistency described in the method above.
As for the molten chocolate center this is really where you can get creative. A piece of dark chocolate gives a rich slightly bitter contrast against the sweeter cake while milk chocolate leans into an overall sweeter more kid friendly flavor. Some people even like using a small piece of chocolate with a caramel or hazelnut filling for an extra layer of flavor once it melts into the batter.
Even with a recipe this simple there are a few small missteps that can affect your final result and knowing what to watch for makes it much easier to get it right on the very first try. One of the most common issues is overcooking. Because mug cakes are so small they cook incredibly fast, and even ten or fifteen extra seconds in the microwave can take you from a soft fudgy texture to a dry rubbery one. Always err on the side of slightly undercooking since the center will continue to firm up as it sits for that final minute of resting.
Another mistake is not mixing thoroughly enough between each layer of ingredients. It might be tempting to rush through the steps especially since the whole process only takes a couple of minutes anyway but skipping the folding and mixing at each stage can leave you with pockets of unmixed cocoa powder or sugar in the final cake. Taking those extra few seconds to properly incorporate each ingredient before adding the next one is what separates a smooth evenly textured mug cake from one with gritty or bitter surprises in random bites.
Using the wrong size or shape of mug can also throw off your results. A mug that is too small might cause the batter to overflow as it rises during cooking while a mug that is too tall and narrow can lead to uneven cooking with the edges turning tough before the center has even set. Sticking to a wide medium sized mug gives you the best balance of even cooking and manageable rise.
Finally be mindful of how deeply you press the chocolate chunk into the batter. Push it in too far and it may sink completely to the bottom meaning you will not get that satisfying molten pocket right in the center where you first break into the cake. Keep it positioned so that it sits just below the surface ensuring it melts perfectly into that soft middle section without disappearing entirely into the base of the mug.
This mug cake is very much designed to be eaten fresh straight out of the microwave while that chocolate center is still warm and gooey. That said if you do want to prepare the dry ingredients ahead of time you can combine the cocoa powder sugar and flour in a small container or bag in advance so that when a craving hits all you need to do is add the oil milk and chocolate chunk before microwaving. This can shave off a few extra seconds of prep time on busy nights.
If you happen to have leftovers though it is rare with something this small and delicious you can cover the mug and store it at room temperature for a few hours then gently reheat it in the microwave for ten to fifteen seconds to soften it back up. Keep in mind that the molten chocolate center will not be quite as liquid the second time around since reheating a cake that has already set behaves differently than cooking raw batter for the first time.
For serving this mug cake is delicious entirely on its own but a small scoop of vanilla ice cream on top takes it to another level entirely with the cold ice cream melting slightly against the warm cake and creating a contrast that highlights both the richness of the chocolate and the freshness of the cream. A light dusting of extra cocoa powder or a few fresh berries on the side also work well if you want to dress it up slightly for guests even though the beauty of this recipe is that it never really needs any extra effort to be genuinely delicious.
Ingredients: 3 tbsp self rising flour, 2 tbsp sugar, 2 tbsp chocolate milk.
Method: Whisk all ingredients in a microwave safe mug until smooth.
Microwave on high for 45–60 seconds.
Ingredients: 3 tbsp self-rising flour, 2 tbsp sugar, 1 tbsp cocoa powder (plus 3 tbsp milk).
Method: Mix the dry ingredients in a mug, then stir in the milk to form a smooth batter.
Microwave on high for 50–60 seconds.
Ingredients: 3 tbsp self rising flour, 1 tbsp sugar, 2½ tbsp milk.
Method: Combine all ingredients directly in your mug and stir well.
Microwave on high for 45–50 seconds.
Ingredients: 3 tbsp Nutella (or any chocolate-hazelnut spread), 3 tbsp milk, 2 tbsp self-rising flour.
Method: Whisk the Nutella and milk together in the mug, then fold in the flour.
Microwave on high for 50–60 seconds.
Ingredients: 1 ripe banana (mashed), 1 tbsp cocoa powder, 3 tbsp oat flour (plus 2 tbsp milk if dry).
Method: Mash the banana in the mug, then mix in the cocoa powder and oat flour.
Microwave on high for 60–75 seconds.
Ingredients: 3 tbsp self rising flour, 1 tbsp cocoa powder, 3 tbsp milk.
Method: Stir all three ingredients together in a mug until smooth.
Microwave on high for 50 seconds.
What makes this recipe worth bookmarking is not just the short ingredient list or the two minute cook time it is how reliably good the results are every single time you make it. Unlike full sized cakes where a small mistake in measuring or mixing can ruin an entire batch a mug cake is forgiving and quick to fix if something goes wrong. If it needs a few more seconds in the microwave you know almost instantly. If the batter looks a little too thick a small splash more milk brings it right back.
This recipe is also incredibly versatile as a base. Once you have mastered the basic method oil cocoa sugar milk flour and a chocolate center you can start experimenting with your own variations. A spoonful of peanut butter swirled into the batter before microwaving a sprinkle of instant coffee powder added along with the cocoa for a mocha version or even a few chopped nuts folded into the batter for texture are all easy ways to make this recipe your own once you understand the fundamentals of how it comes together.
At the end of the day this 3 ingredient chocolate mug cake proves that you do not need an oven a long ingredient list or advanced baking skills to enjoy a genuinely satisfying homemade dessert. It is quick enough for a weeknight craving simple enough for a first time baker and impressive enough that it never feels like a compromise compared to a full sized cake. Once you make it the first time and see that molten chocolate center spill out with your first spoonful it is very likely to become your go to dessert whenever that chocolate craving hits.

One Response