
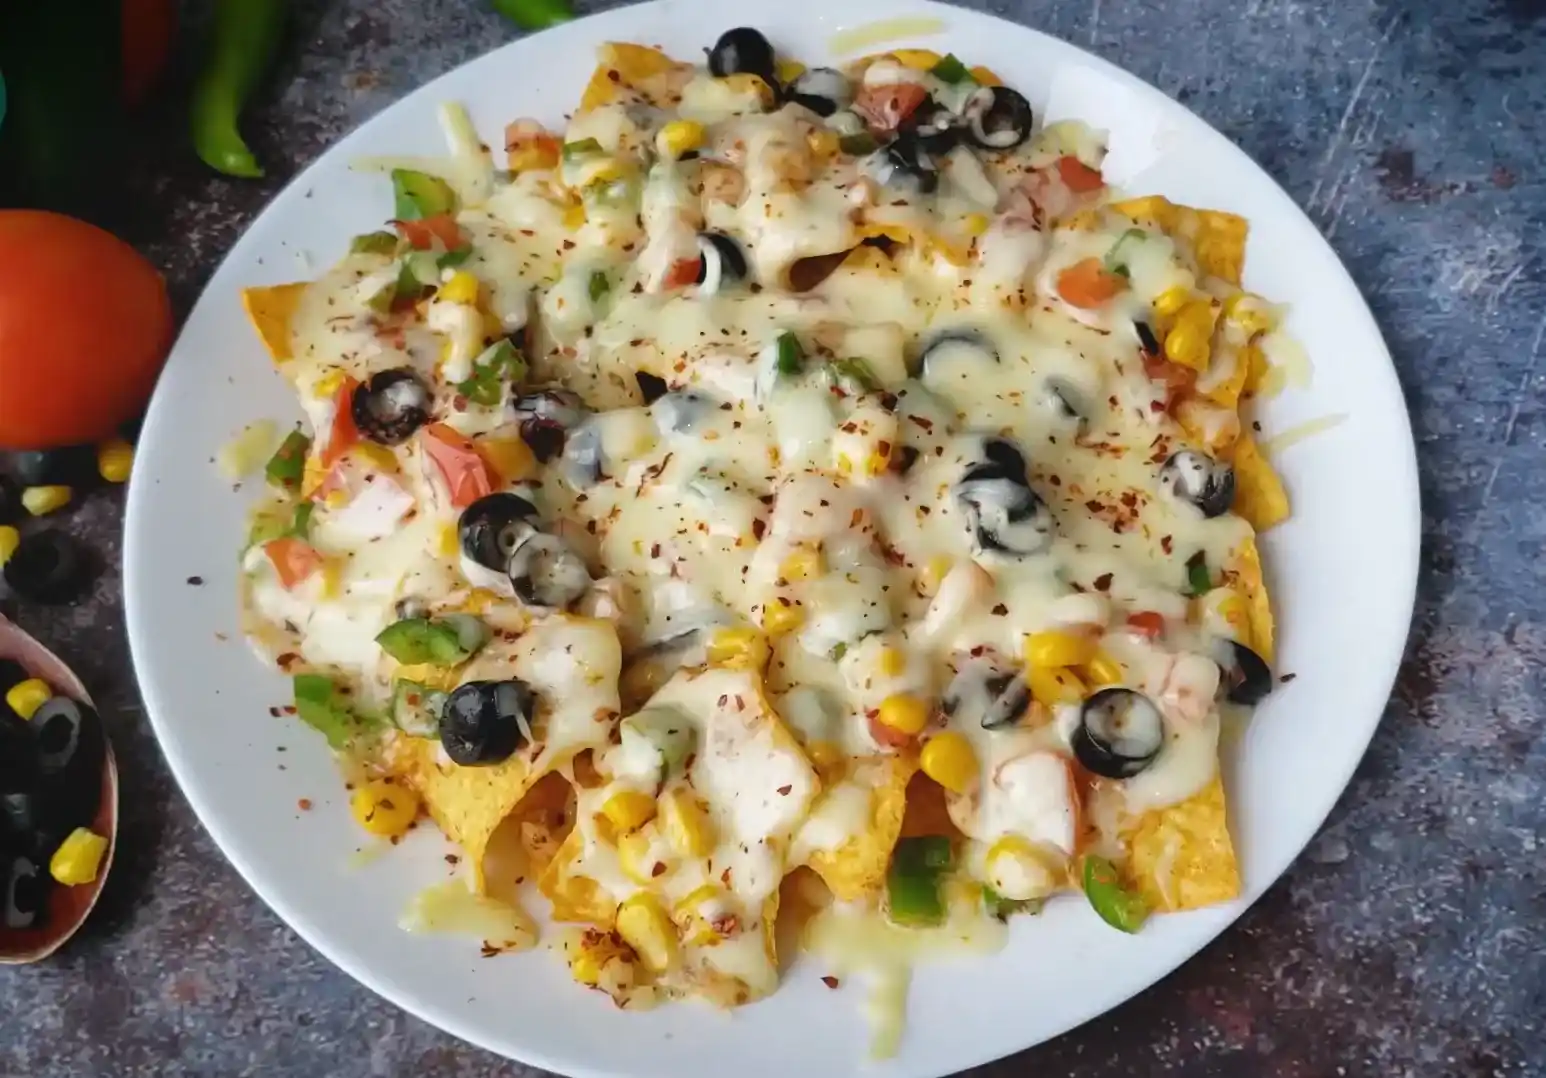
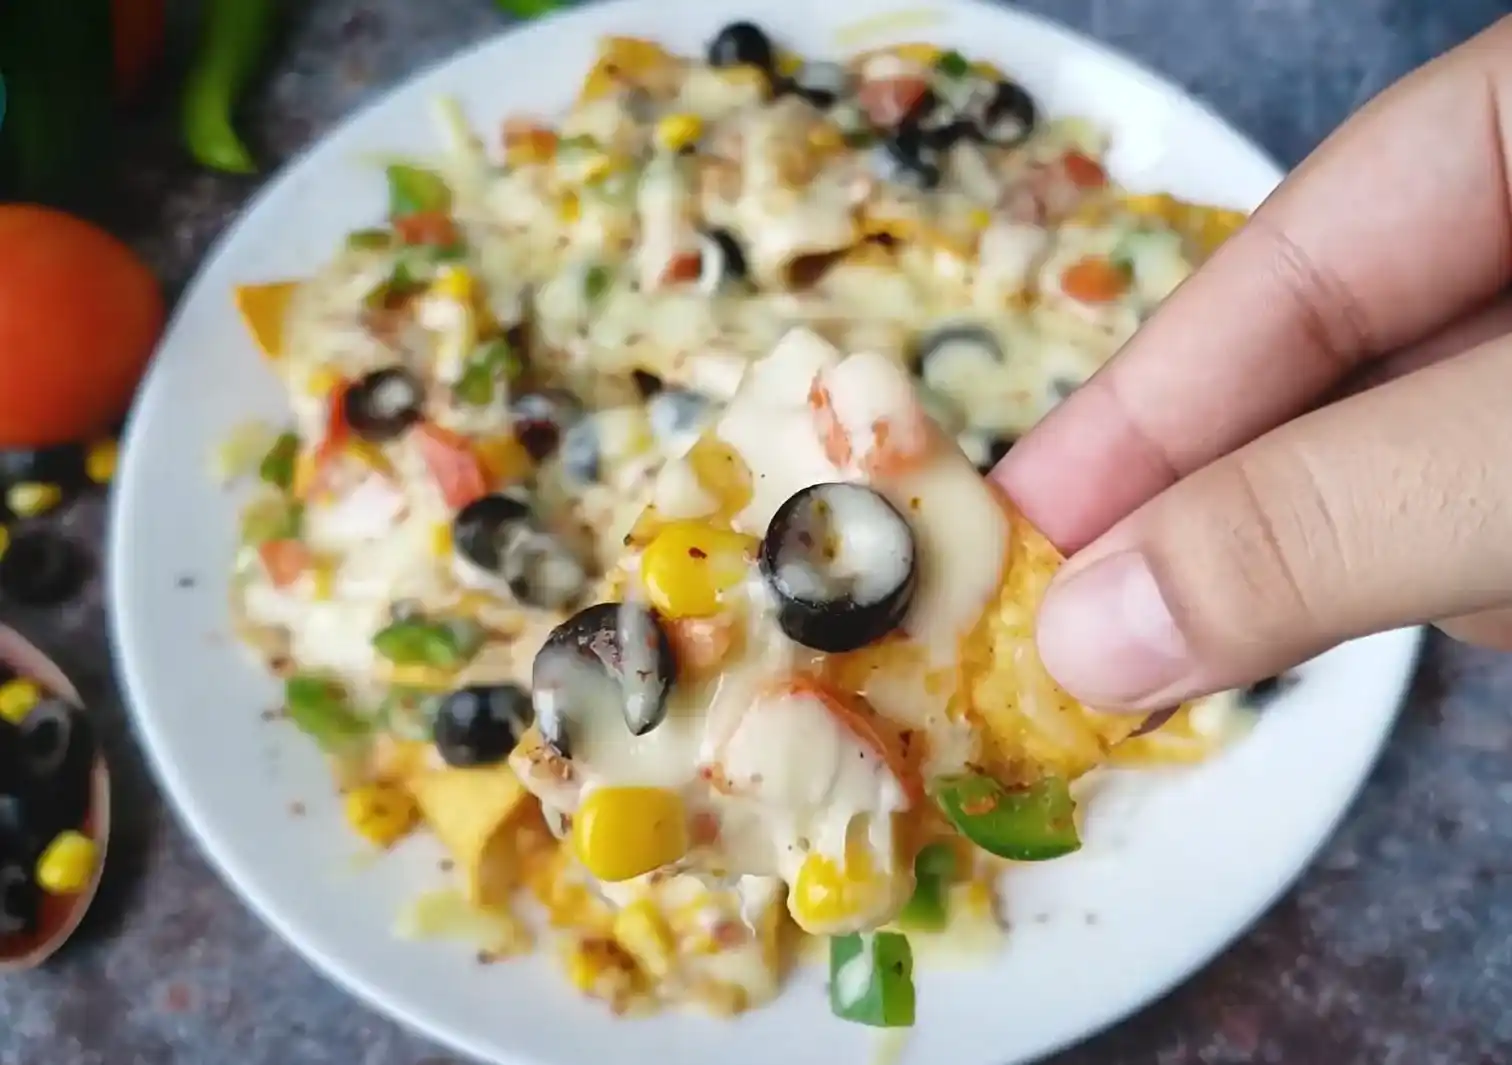
Nachos are far more than a simple casual snack they represent a culinary canvas where texture flavor temperature and technique converge to create something extraordinary. Whether you are hosting a game night gathering throwing a lively weekend party organizing a family movie evening or simply indulging in a comforting late night craving a well crafted platter of cheesy nachos stands as the undisputed champion of shareable dishes.
When prepared correctly nachos offer an exquisite study in contrasts crisp sturdy corn tortilla chips carrying a rich layer of perfectly melted cheese balanced by vibrant seasoned vegetables juicy tomatoes sweet corn savory black olives and aromatic spices. Every single bite delivers a harmonious explosion of warm gooey goodness alongside fresh crunchy condiments.
However many home cooks frequently encounter frustrating pitfalls when attempting to make nachos at home. Common problems include soggy chips that break under pressure unmelted or greasy cheese uneven topping distribution where only the top layer receives cheese or bland vegetable mixtures that lack depth. Achieving that elusive restaurant quality bite where every individual chip is perfectly coated and structurally sound requires an understanding of layering dynamics ingredient synergy moisture control and heat application.
In this comprehensive guide we walk you through the complete art and science of preparing the ultimate Easy Cheesy Nachos Recipe from scratch. We will cover the core principles of building a structural nacho base dissect the role of each ingredient shown in our step by step preparation outline precise measurement ratios and share crucial culinary tips to ensure your homemade nachos turn out flawless every single time.
To master the art of making loaded nachos one must first understand what makes them so universally satisfying. A chef grade nacho platter relies on four essential structural and flavor pillars:
The foundation of any great nacho dish is the tortilla chip. Thin delicate deli style chips might be pleasant for dipping into salsa but they will inevitably fail when loaded with heavy cheese and damp toppings. For loaded nachos you must choose thick stone ground corn tortilla chips. They provide the necessary structural strength to support multiple layers without breaking or turning into a soggy mess.
Cheese serves two pivotal functions in a nacho platter flavor and binding. A high fat excellently meltable cheese acts as a waterproof barrier between the crisp chip and the moist vegetable toppings. Mozzarella cheese is prized for its high moisture to fat ratio providing those iconic dramatic cheese pulls while offering a mild creamy flavor profile that lets the seasoned vegetables shine.
A heavy layer of cheese and chips requires fresh acidic and crunchy elements to cut through the richness. The ideal topping blend combines:
Acidity & Juiciness: Freshly diced tomatoes.
Earthy Crunch: Diced green capsicum (bell pepper).
Umami & Saltiness: Sliced black olives.
Natural Sweetness: Tender sweet corn kernels.
Unseasoned vegetables can make a nacho platter taste flat and diluted. By tossing the chopped vegetables with dried oregano chili flakes black pepper sea salt and a touch of tangy tomato ketchup or salsa before placing them onto the chips you create a cohesive seasoned mix where every ingredient contributes to a unified flavor profile.
Before diving into the preparation steps here is a quick overview of the recipe’s timing yield and dietary profile.
| Recipe Attribute | Details |
| Recipe Name | Easy Cheesy Loaded Nachos Platter |
| Cuisine | Tex-Mex/Party Appetizer |
| Prep Time | 15 Minutes |
| Cook/Melt Time | 8 – 10 Minutes (Oven)/2 Minutes (Microwave) |
| Total Time | 25 Minutes |
| Servings | 4 – 6 Portions |
| Skill Level | Beginner-Friendly |
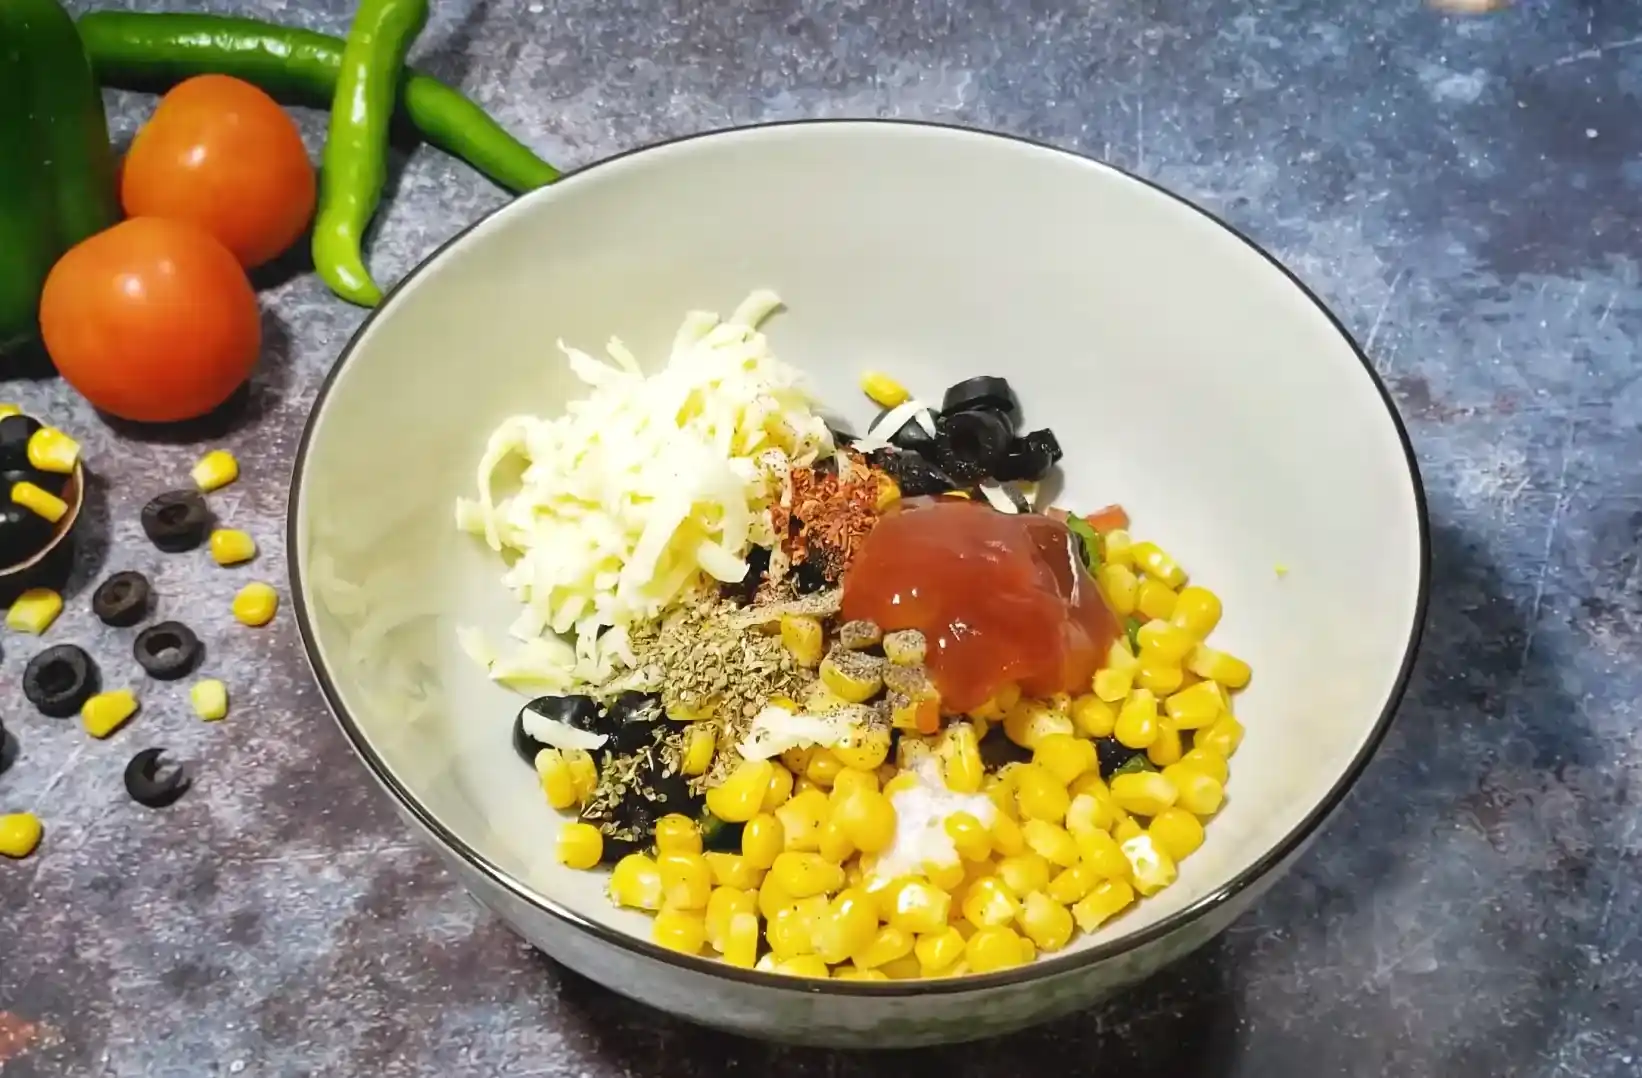
To replicate the exact visual quality and flavor balance of this recipe gather the following ingredients. Ensure your vegetables are washed dried and chopped prior to beginning assembly.
Tortilla Chips: 1 Large bag, Thick restaurant style stone ground corn chips work best.
Fresh Tomatoes: 1 Small (approx. 1/2 Cup finely chopped with seeds removed).
Green Capsicum (Bell Pepper): 1/2 Cup (finely diced).
Black Olives: 1/2 Cup (sliced into rings).
Sweet Corn Kernels: 1/2 Cup (steamed or thoroughly drained canned corn).
Shredded Mozzarella Cheese: 1.5 Cups total (divided: 1/2 cup for the veggie mix 1 cup for the top blanket). You can also blend in Cheddar or Monterey Jack for extra sharpness.
Red Chili Flakes: 1/2 Teaspoon (adjust to preferred heat level).
Black Pepper Powder: 1/4 Teaspoon (freshly ground).
Dried Oregano Leaves: 1/2 Teaspoon.
Salt: To Taste (approx. 1/4 Teaspoon go light as chips and olives are already salty).
Tomato Ketchup/Mild Salsa: 1 Tablespoon (adds a glossy sheen mild acidity and sweet tanginess that binds the mix).
Follow these precise steps to prepare the seasoned vegetable topping bowl. Tossing the ingredients together in a single bowl first ensures that spices and cheese are evenly distributed before touching the chips.
| Step | Ingredient/Action | Purpose & Detail |
| 1 | Diced Tomatoes | Adds juicy freshness and natural acidity. |
| 2 | Crunchy Capsicum | Brings vibrant color and a fresh, crisp bite. |
| 3 | Black Olives | Delivers a rich, savory, and tangy contrast. |
| 4 | Sweet Corn | Provides a touch of natural sweetness and pop. |
| 5 | Mozzarella Cheese (½ Cup) | Acts as a rich binder to hold the veggie mixture together. |
| 6 | Spices & Ketchup | Infuses bold flavor, heat, and a tangy sauce coating. |
| 7 | Thorough Toss | Mixes all ingredients evenly so every bite is packed with flavor. |
Select a wide clean mixing bowl. Take your 1 small chopped tomato (approximately 1/2 cup). Ensure you remove the inner watery seed core before dicing to minimize extra moisture. Place the diced tomatoes into the bowl. This forms the fresh juicy salsa foundation of your topping.
Measure 1/2 cup of finely diced green capsicum (green bell pepper). Add the capsicum directly over the tomatoes in the bowl. The vibrant green color provides great visual contrast while its firm structure adds an essential crunch to every bite.
Take 1/2 cup of pre sliced black olives. Add them into the bowl with the tomatoes and capsicum. Black olives introduce a briny umami rich flavor that balances the fresh sweetness of the corn and tomatoes.
Add 1/2 cup of sweet corn kernels into the mixing bowl. If using canned corn ensure it is thoroughly drained and pat dry with a paper towel. The bright yellow kernels bring pops of sweetness and visual richness to the mixture.
Measure out 1/2 cup of your shredded Mozzarella cheese and sprinkle it directly into the vegetable bowl. Mixing a portion of cheese directly into the raw toppings allows the cheese to act as an internal binder as it melts holding the diced vegetables together so they don’t slide off the chips when eaten.
Sprinkle 1/2 teaspoon of red chili flakes evenly over the vegetable and cheese mixture. This establishes a warm gentle background heat without overpowering the delicate flavors of the vegetables.
Add 1/4 teaspoon of freshly ground black pepper powder into the bowl. Black pepper enhances the earthy notes of the green capsicum and adds a warm subtle spice.
Add 1/2 teaspoon of dried oregano leaves. Pro-Tip: Place the oregano leaves in the palm of your hand and crush them gently with your thumb before dropping them into the bowl. This friction releases the natural essential oils trapped in the dried herb maximizing its fragrant aroma.
Add salt to taste (roughly 1/4 teaspoon). Remember to exercise restraint here as commercial tortilla chips and canned black olives already contain sodium.
Pour 1 tablespoon of tomato ketchup over the ingredients in the mixing bowl. Using a large spoon or spatula gently fold and mix all ingredients together until the vegetables herbs spices cheese and ketchup are thoroughly coated and visually uniform. The mixture should look glossy colorful and well distributed.
Now that your loaded topping mix is fully prepared it is time to assemble and melt the nacho platter.
Select a wide heat safe circular platter oven safe ceramic dish or baking sheet lined with parchment paper. Take your tortilla chips and lay out a generous single layer across the base in a circular slightly overlapping fan pattern. Ensure there are no large gaps near the center so toppings don’t fall directly onto the plate.
Using a spoon or spatula scoop generous portions of your prepared seasoned vegetable cheese mixture. Evenly scatter the topping over the arranged tortilla chips. Aim to cover as much chip surface area as possible leaving only the outer handles of the chips exposed for easy grabbing.
Take the remaining 1 cup of shredded Mozzarella cheese and sprinkle it generously over the entire platter. Make sure to distribute cheese evenly toward the outer perimeter. This top layer of cheese will melt down over the vegetable mix anchoring all ingredients securely to the chips beneath.
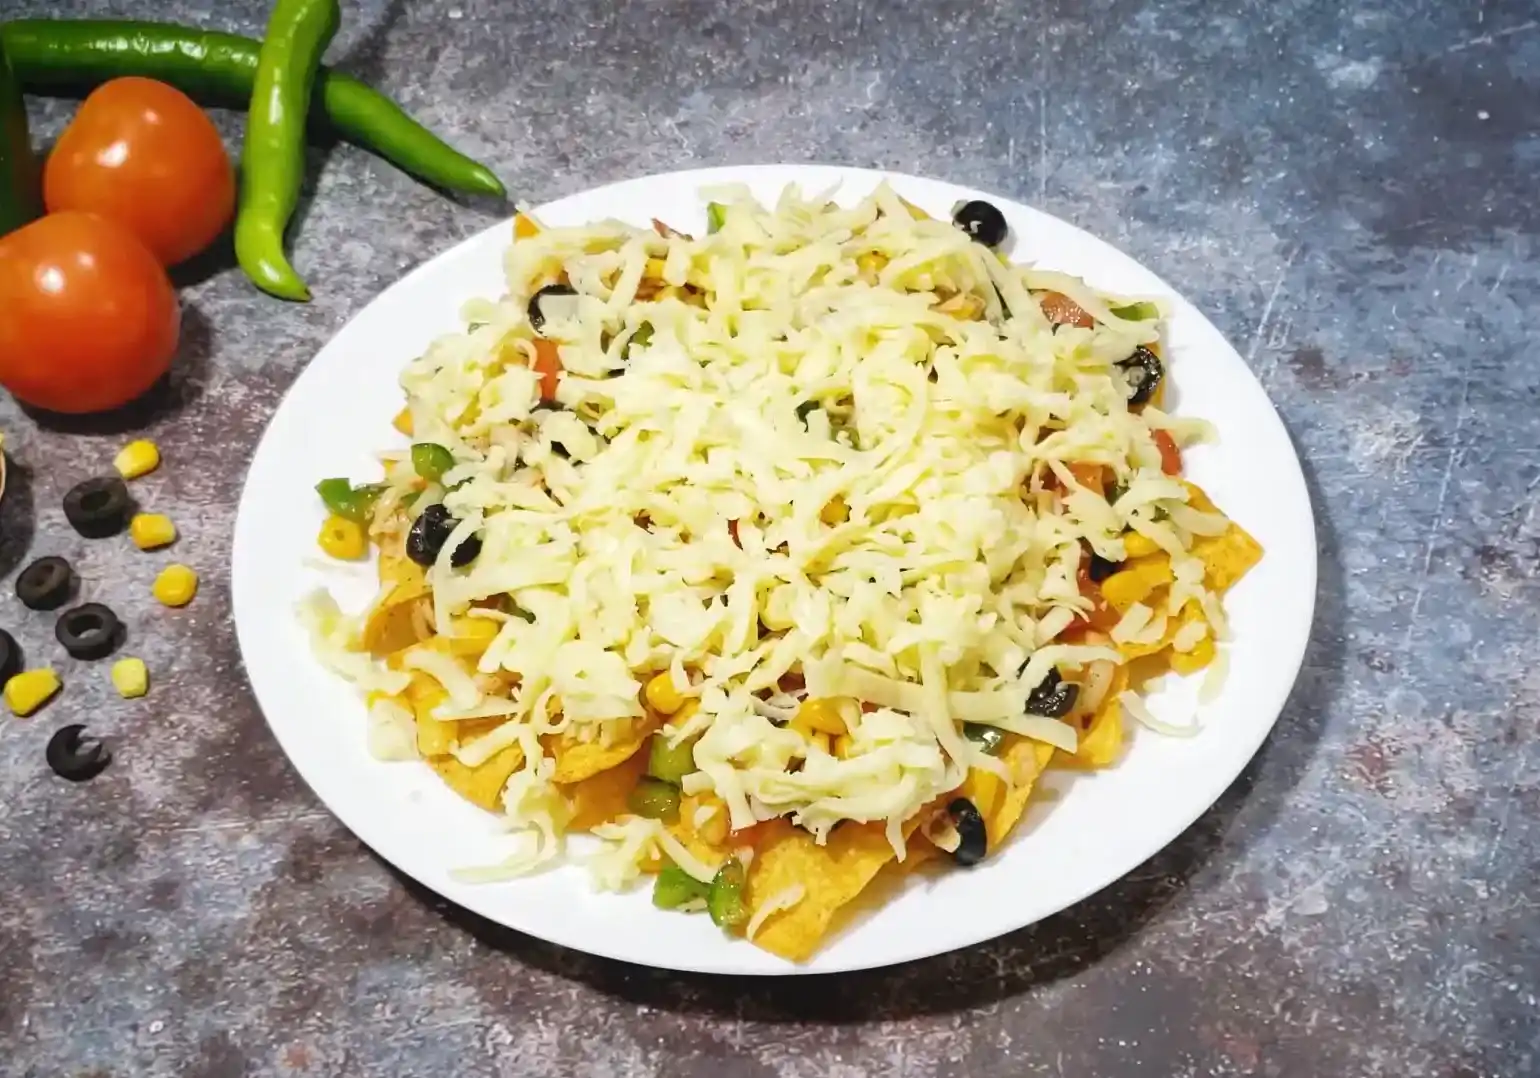
Choose your preferred heat method to melt the cheese:
Oven Method (Recommended for Best Texture): Pre heat your oven to 180°C (350°F). Place the assembled platter onto the middle rack and bake for 8 to 10 minutes or until the Mozzarella cheese is completely melted bubbling and starting to show subtle golden spots.
Microwave Method (Quick Option): Place the microwave safe platter into the microwave and heat on HIGH for 1.5 to 2 minutes or until the cheese is completely melted and gooey.
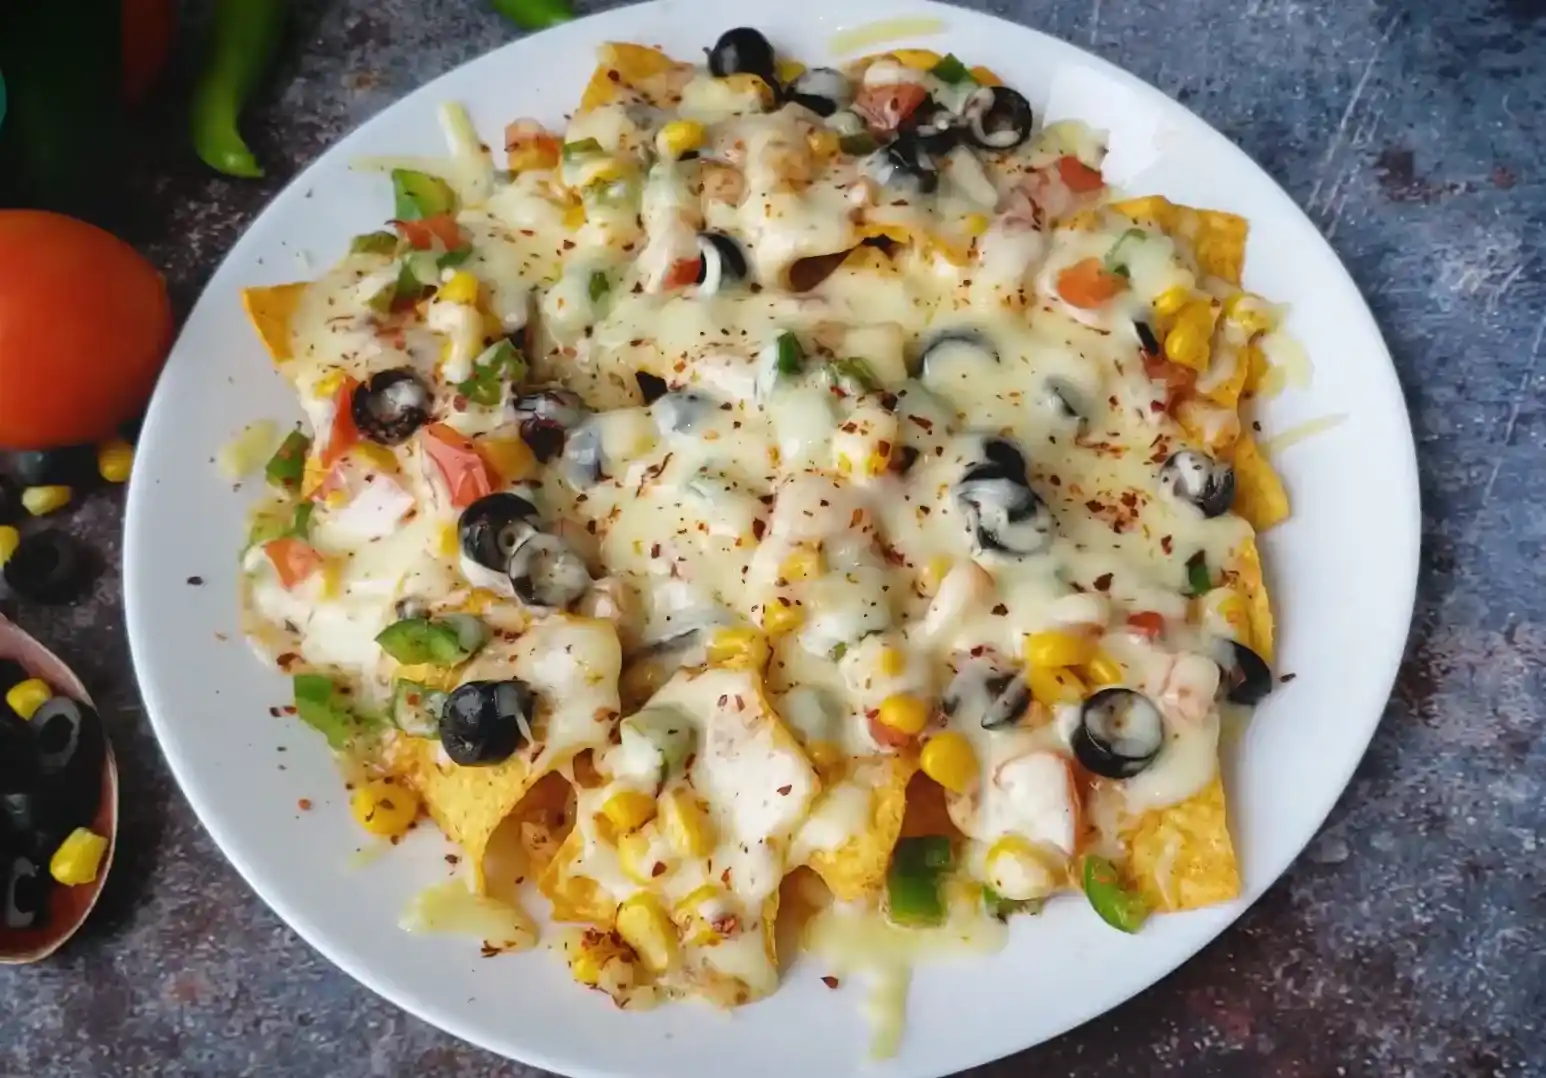
Remove the platter carefully using oven mitts. Sprinkle a light pinch of extra oregano or chili flakes on top for garnish and serve immediately while piping hot.
To truly understand why this recipe works so well and how you can modify it for your own kitchen let us explore the science behind each component.
| Layer | Ingredients & Setup | Function & Purpose |
| Top Layer | 1 Cup Mozzarella Blanket | Protection & Melt: Creates a golden melted seal that locks in heat and gives that perfect cheesy pull. |
| Middle Layer | Seasoned Veggie Mix + 1/2 Cup Mozzarella Binder | Flavor & Structure: Packed with spiced veggies bound together by melted cheese so toppings stay in place. |
| Bottom Layer | Sturdy Corn Tortilla Chips | Base & Ultimate Crunch: Heavy duty corn chips that hold up the toppings without getting soggy. |
Cheese selection can make or break a nacho dish. Cheeses are essentially emulsions of milk fat and water held together by a protein network (casein). When heated the fat melts and the protein matrix relaxes.
Mozzarella: Has high moisture content and melts easily into long elastic strands (cheese pulls). However because Mozzarella has a mild taste pairing it with seasoned acidic toppings creates the perfect balance.
Cheddar & Monterey Jack: Contain higher levels of sharp flavor. Combining 70% Mozzarella (for texture) with 30% Sharp Cheddar (for taste) creates a world class cheese blend.
Pre Shredded vs. Freshly Shredded: Pre packaged shredded cheeses are coated with anti caking agents like potato starch or powdered cellulose to prevent clumping in the bag. These starches absorb moisture and hinder smooth melting. For maximum gooeyness purchase block cheese and shred it fresh at home.
The number one complaint among home cooks making nachos is sogginess. Chips become soggy when exposed to liquid steam or water heavy toppings during the baking process. Here is how our recipe prevents sogginess:
Deseeding Tomatoes: Tomato seeds and their surrounding jelly contain up to 90% water. Removing this core ensures you get fresh tomato flavor without releasing liquid onto the chips.
Draining Canned Ingredients: Canned corn and olives sit in brine. Rinsing and drying them thoroughly eliminates unwanted excess moisture.
The Cheese Barrier: Layering a portion of cheese directly on top of the chips before adding heavy toppings creates a protective fat barrier that repels water during cooking.
While this Easy Cheesy Nachos recipe offers a fantastic vegetarian baseline nachos are endlessly versatile. You can easily modify the topping mix to suit various dietary preferences and flavor profiles.
If you want to turn this appetizer into a heavy protein packed main meal consider adding one of the following cooked proteins to your vegetable mixing bowl.
Seasoned Ground Beef: Cook lean ground beef with taco seasoning (cumin, chili powder, garlic powder, onion powder) and drain excess fat before tossing with the veggies.
Shredded Shredded Chicken: Toss cooked shredded chicken breast with a tablespoon of smoky BBQ sauce or enchilada sauce.
Refried Beans or Black Beans: Add 1/2 cup of warm drained black beans or dollops of seasoned refried beans across the chip layer before adding the veggie mixture.
For those who prefer a serious spice kick:
Pickled Jalapeno Rings: Add 1/4 cup of sliced pickled jalapenos into the vegetable bowl or arrange them on top of the melted cheese layer.
Fresh Sliced Serrano or Habanero: Thinly slice fresh green serrano peppers for a raw bright heat spike.
Hot Sauce Drizzle: Finish the baked platter with a zigzag drizzle of your favorite habanero or chipotle hot sauce.
Give your nachos a Mediterranean twist by adjusting the topping ingredients.
Replace Mozzarella with a blend of Mozzarella and crumbled Feta cheese.
Add diced cucumbers Kalamata olives diced red onion and chopped fresh parsley.
Drizzle with a cool garlic yogurt sauce or tzatziki right after baking.
Even with a straightforward recipe small mistakes can impact the final result. Below is a detailed troubleshooting guide to help you overcome common preparation issues.
Cause: Vegetables contained too much moisture or the platter was baked at too low a temperature for too long causing steam to build up.
Solution: Deseed tomatoes drain corn/olives thoroughly and ensure your oven is fully pre heated to 180°C (350°F). High heat melts cheese quickly before vegetable liquids can penetrate the chips.
Cause: The Single Tall Mound mistake piling all chips into a tall pyramid and dumping toppings only on the peak.
Solution: Always spread chips out in a wide flat overlapping single layer or construct two thin distinct layers (Chip ➔ Cheese/Veggie Mix ➔ Chip ➔ Cheese/Veggie Mix).
Cause: The vegetable pieces were chopped too large or there wasn’t enough cheese to bind them together.
Solution: Dice all vegetables finely (roughly the size of corn kernels). Small pieces adhere much better to melted cheese than large vegetable chunks.
Cause: The cheese was overheated or subjected to direct high broiling heat for too long causing the milk fats to separate from the solids.
Solution: Keep an eye on your platter while in the oven. Remove it as soon as the cheese is fully melted and fluid. Avoid leaving it under a high broiler for extended periods.
To elevate your Easy Cheesy Nachos into an unforgettable feast serve your hot platter alongside classic Tex Mex side dips and refreshing beverages.
| Nacho Platter Items | Description |
| Fresh Guacamole | Creamy & Rich |
| Cool Sour Cream | Cuts the Heat |
| Pico de Gallo | Fresh & Tangy |
| Spicy Queso Dip | Extra Cheesy |
| Ice-Cold Drinks | Limes, Soda, Mocktails |
Classic Homemade Guacamole: Ripe mashed avocados folded with lime juice finely diced red onion chopped cilantro sea salt and a pinch of cumin. The smooth buttery richness of avocado pairs magnificently with crisp chips.
Cooling Sour Cream/Hung Curd: A ramekin of chilled sour cream provides an immediate cooling contrast to warm chili flakes and black pepper.
Pico de Gallo (Fresh Salsa): Extra diced tomatoes onions jalapenos cilantro and lime juice served cold alongside the warm baked platter.
Citrus Lime Mocktails/Mint Margaritas: The sharp acidity of lime and fresh mint cuts cleanly through melted cheese refreshing your palate between bites.
Chilled Sodas & Iced Teas: Carbonated drinks break up rich fats on the tongue making every fresh bite of nachos taste just as good as the first.
While nachos are always best enjoyed fresh out of the oven or microwave here is how you can manage advance prep and leftovers.
If you are expecting guests or preparing for a party you can complete 90% of the prep work in advance.
Pre Dice the Veggies: Chop tomatoes capsicum and olives up to 24 hours in advance. Store them in airtight containers in the refrigerator (keep tomatoes in a separate container lined with a paper towel to absorb excess liquid).
Pre Shred the Cheese: Shred your Mozzarella block ahead of time and store it sealed in the fridge.
Assemble Last Minute: Do not assemble the chips and toppings until immediately before baking.
If you end up with leftover baked nachos:
Storage: Transfer remaining nachos into an airtight container and refrigerate for up to 1–2 days.
Reheating (Avoid the Microwave): Microwaving leftover nachos will make the chips soft and chewy. Instead spread leftovers onto a baking sheet and heat in a preheated oven at 190°C (375°F) for 5 to 7 minutes. This will crisp the chips back up and re-melt the cheese efficiently.
To wrap up this guide keep these four golden rules in mind every time you make nachos
The Moisture Elimination Rule: Always pat wet ingredients dry. Steam is the enemy of crispiness.
The Double Layer Stacking Technique: For large crowds build two thin layers rather than one massive pile. Double layering guarantees an ideal chip to cheese ratio throughout the entire dish.
Fresh Shredding Advantage: Block cheese shredded at home melts significantly better than pre bagged varieties.
Serve Hot & Fresh: Nachos wait for no one Serve your platter immediately after baking while the cheese pull is at its peak strength.
Boil chicken breasts in salted water or broth for 12–15 minutes until fully cooked then shred it using two forks or a hand mixer.
You can toss shredded chicken into a fresh Greek salad mix it with Greek yogurt for a low fat chicken salad or wrap it in lettuce cups with fresh veggies.
Toss boiled shredded chicken into your favorite cooked pasta along with marinara or alfredo sauce, garlic, olive oil, and parmesan cheese for a quick meal.
Shredded chicken is great for quick weeknight meals like 15 minute chicken tacos BBQ chicken sandwiches quick quesadillas or hearty grain bowls.
Simmer shredded chicken in a sauce made of salsa taco seasoning cumin garlic powder and diced tomatoes for rich savory Tex Mex flavor.
Yes, Season chicken breasts cover them tightly with aluminum foil in a baking dish and bake at 190°C (375°F) for 25 minutes before shredding with forks.
Classic BBQ sauce creamy garlic mayo spicy buffalo sauce rich alfredo and tangy homemade salsa all pair exceptionally well with shredded chicken.
Making restaurant quality loaded nachos at home doesn’t require expensive culinary equipment or hours of complex preparation. By understanding the importance of structural chips proper moisture management pre seasoning your vegetable mix and spreading a generous layer of high melt Mozzarella you can transform simple pantry staples into a show stopping dish.
Give this Easy Cheesy Nachos Recipe a try for your next party game day or snack craving. Enjoy the crunch savor the cheese pull and feel free to customize the toppings to make it uniquely yours

2 Responses